TL;DR
Borders affect how your artwork is printed, framed, signed, and displayed. The most common mistakes involve confusing image size with paper size, choosing borders without a display plan, and treating canvas like paper. Plan your presentation first, then choose a border that supports it.
A border isn’t just extra white space around your artwork. In fine art printing, borders serve very real, practical purposes. They can protect the image edge, give you room to sign, make framing and matting easier, and help your artwork visually breathe.
At the same time, the wrong border choice can cause frustrating framing surprises, unintended cropping, or prints that simply don’t display the way you expected. Over the years, we’ve seen the same border mistakes come up again and again when artists and photographers place print orders.
If you want a deeper look at the printing method behind our fine art paper prints, start with what giclee printing is and why it matters.
Below are the five most common border mistakes we see, along with guidance to help you avoid them before placing your next order.
Mistake #1: Adding a Border Without Knowing Why
Borders are optional. They’re not automatically better, and they’re not required for every print. The best border choice depends entirely on how the print will be displayed once it leaves the printer.
If you plan to frame with a mat, sign your work, sell limited editions, or want added edge protection, a border can make your life much easier. If you’re going for a modern, edge-to-edge presentation, skipping the border may be the better option. If you want help choosing, see how to choose the best border option for your prints.
Borders work best when you need:
- Room for a signature, title, or edition notes
- Extra flexibility when matting or framing
- Protection for delicate image edges
- A classic gallery-style presentation
Skipping a border makes sense when:
- You want a full-bleed, modern look
- The image relies heavily on edge detail
- You’re using a float frame or edge display
- Maximizing image area is the priority
Mistake #2: Confusing Image Size With Paper Size
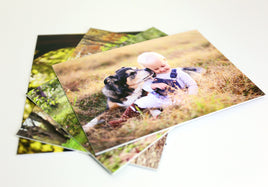
This is the most common sizing mistake we see, especially for customers ordering from our fine art printing collection or our photo printing collection.
Image size refers to the printed artwork area. Paper size includes the image plus any border you add around it. These two measurements are not interchangeable.
Quick sizing math:
Paper width = image width + left border + right border
Paper height = image height + top border + bottom border
Example: A 16×20 image with a 1 inch border on all sides becomes an 18×22 sheet.
If you want a Stackhouse-specific walkthrough of sizing and border choices during ordering, start here: selecting print size and border options.
If you’re also dialing in sizing across multiple formats, our guide on choosing the right file requirements and print sizes is a great companion read.
Always confirm whether your frame or mat is sized for the image opening or the full paper size before ordering. (Related: why print size matters for art reproductions.)
Mistake #3: Forgetting How Framing Changes Everything
If you plan to frame your print, borders become a framing tool rather than a design afterthought. A small border can hide under a mat, protect the printed edge, and allow slight shifts during mounting.
For most framed fine art prints, a 0.5–1 inch border strikes the right balance between flexibility and paper size. If you want a framing-specific walkthrough, see how to choose the right frame for your artwork.
Note: The Stackhouse does not offer custom framing. If you’re unsure, check your frame or mat specs before placing your order.
Mistake #4: Treating Canvas Like Paper
Canvas wraps have depth, and that depth requires extra image area for the sides. Edge choices affect both appearance and cropping.
- Mirrored edges: Clean and safe for most artwork
- Solid color edges: Minimal and modern
- Image wrap edges: Best for abstract work, risky for faces and text
If you’re ordering from our gallery wrapped canvas prints collection (or anything from the broader canvas printing collection), these two guides will prevent most “why did my edges crop?” surprises:
Mistake #5: Sending Files That Aren’t Set Up for the Border You Chose
Border decisions should happen before exporting your files. Leave room for signatures, keep important details away from edges, and size files intentionally.
- 300 PPI at final image size
- TIFF or high-quality JPEG exports
- Safe margins for faces, text, and key details
- 0.5–1 inch of space if signing
- Final image vs paper size check before ordering
If you’re still refining file setup, these two posts pair well with this article: what file format should I upload for printing and mastering image resolution for picture-perfect prints.
For a Stackhouse-specific overview of what to upload, how to export, and what we recommend before checkout, see our submit artwork printing guide.
Quick Border Presets We Recommend
- No border: full-bleed, modern look
- 0.25 inch: minimal edge protection
- 0.5 inch: ideal for signing and mat overlap
- 1 inch: classic gallery presentation
- 2 inches: bold, archival statement
If you’re unsure which option to select at checkout, use our print size and border options guide or contact us before your order goes to print.
Ready to print? Start with giclee fine art prints or photo prints and choose the border option that fits your display plan.
Related Reading