

Where to get art prints made is a real question, not just a search phrase. The right answer depends on what kind of artwork you have, how close the print needs to feel to the original, and how the buyer will receive it.
Here is the plain answer: choose a print shop that can help you match the artwork to the right print path, not just take a file and send back paper. For artists and photographers, that usually means checking the image type, final size, paper surface, crop, border, proofing plan, and reorder plan before you spend money on inventory.
Where to Get Art Prints Made Without Guessing
Start by separating the job into three questions. What is the artwork? What does the buyer need to feel when they hold it? What will make the order easy to repeat later?
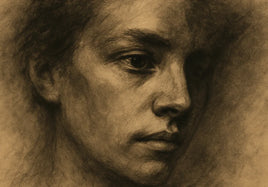
A watercolor reproduction, a black-and-white photo, a digital illustration, and a signed edition can all be called art prints. They should not all be treated the same way. The print method, paper, border, and proofing step should follow the artwork instead of forcing every file through one generic product.
That is why a useful printer should make the next step clearer. If the conversation only starts with quantity and price, you may miss the detail that decides whether the print feels right in person.
Choose the Print Path Before the Paper
For paintings, drawings, mixed media, and artwork where paper texture matters, start by comparing giclee fine art prints. That path is usually the better starting point when the paper needs to feel like part of the artwork.
For photography, portraits, digital work, or images that need a polished photo surface, compare professional photo prints. Photo papers can hold crisp detail, smooth gradients, and familiar photographic finishes in a way many buyers understand quickly.
This is not about one product being better than the other. It is about matching the surface to the file. A soft drawing can lose its feeling on the wrong finish. A sharp photo can feel flat if the paper fights the detail. Pick the lane first, then compare the surfaces inside that lane.
Use the Artwork Type as the First Filter
Ask what the original artwork needs to keep. Paintings and drawings often need paper tone, texture, and a calmer surface. Photography may need smooth detail, deeper contrast, or a finish that looks familiar to photo buyers. Digital art can go either way, depending on whether the image needs soft paper feel or clean graphic punch.
If you are reproducing original art, look at brush texture, pencil marks, pale washes, deep shadows, and any edge detail that gives the piece its character. If you are printing a photograph, check shadow detail, skin tones, highlight areas, and whether glare would hurt the viewing experience.
If paper choice is the hard part, keep the paper and canvas guide open while you compare the options. It gives the print decision a real source instead of leaving you to guess from product names alone.
Lock the Size Before You Judge the File
A file can look good on a screen and still fail at the final print size. Before you choose where to order, decide the actual size you want to sell or display. Then check the file at that size.
Look at the corners, signature, border area, small type, fine lines, and deep shadows. A tiny flaw can become obvious on a large print. A delicate detail can disappear on a small one. The printer can help, but you still need a clear target size before anyone can judge the file properly.
When crop, border, or aspect ratio is part of the decision, use the print sizes, borders, and cropping guide before you order. That is the kind of source page a broad service article needs because it turns general advice into a real production check.
Decide Whether the Print Needs a Border
Borders are not decoration. They affect signing, matting, framing, handling, and how the image sits on the sheet. A borderless print can feel clean and modern. A white border can make the print easier to handle, sign, or place behind a mat.
Do not add a border only because it sounds more professional. Add it because the artwork, frame plan, or buyer experience needs it. Check the outside print size too, because a border can change how the sheet fits a sleeve, frame, or package.
Use a Proof or Sample When the Surface Matters
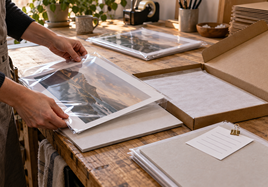
A screen cannot show paper thickness, texture, tone, glare, or how the finished piece feels in a buyer's hands. If the difference between two surfaces matters, use a real-world check before ordering a larger run.
A media sample can help you compare surfaces in your own light. Use a sample to choose paper, then use a proof of your own artwork when you need to check exact color, crop, border, and shadow detail.
Those are different jobs. A sample answers, 'Which surface feels right?' A proof answers, 'Does this file work on that surface?' Keeping those checks separate makes the order easier to trust.
Pick a Printer That Helps You Repeat the Order
A good art print is not only one good copy. If you plan to sell the piece, you may need the same setup again later. Save the file name, print size, outside size, paper, border, quantity, and proofing notes.
That record matters when a print sells faster than expected or when a collector asks for the same piece months later. Reorders are easier when the first order has a clear recipe. They are harder when you only remember that the print looked good.
Watch for Red Flags Before You Order
Be careful when a print service makes every artwork sound like the same product. Also be careful when you cannot find real paper information, sizing guidance, file guidance, or a way to ask for help before ordering.
Low price can be useful, but it should not be the only decision. A cheap print that uses the wrong surface, crops the art badly, or cannot be reordered consistently can cost more later. For sellable art, the finished object matters.
Keep the First Run Small
If you are still testing a new image, size, or paper, start with a small run. Show it to buyers. Photograph it for your shop. Pack it. Carry it to a fair. See whether the size and surface make sense in real life.
A smaller first run gives you room to adjust. If the print looks right and buyers respond, the next order is easier. If something feels off, you can fix one decision instead of sitting on a full stack of prints that almost work.
Save the Print Recipe
Once the first print looks right, write down the recipe while the details are still fresh. Save the product path, paper, size, border, file name, crop notes, quantity, and proofing decision in one place.
That note is useful even when you think you will remember. Six months later, a reorder can look slightly different because one small choice changed. A simple record gives the next order a real target and helps the printer match the setup you already approved.
If the print is part of an edition, keep one approved copy as a reference. Mark it clearly so it does not get sold. That physical reference is more useful than a memory of how the screen looked on order day.
A Simple Order Checklist
Before you place the order, make sure you can answer these questions:
- Is this artwork best treated as a fine art reproduction, photo print, digital art print, or mixed-media print?
- What final size will buyers understand and use?
- Does the file have enough resolution at that exact size?
- Should the print be borderless, signed, matted, framed, mounted, sleeved, or shipped flat?
- Which paper or surface supports the image instead of fighting it?
- Do you need a media sample, a proof of the artwork, or both?
- Have you saved the approved setup for the next reorder?
If one answer is missing, solve that one before making the order bigger. A simple complete setup beats a complicated order built on guesses.
Final Takeaway
Where to get art prints made depends on the artwork, not just the printer name. Start with the print path, choose a size and surface that fit the image, check crop and borders, use a sample or proof when the choice matters, and save the setup so your next order can match the first one.
FAQ
Should artists use giclee or photo prints?
Use giclee fine art prints when paper feel, texture, and a fine-art presentation matter. Use professional photo prints when the image needs a polished photographic finish, crisp detail, or familiar photo-paper shine.
Do I need a proof before selling art prints?
Use a proof when color, crop, paper feel, border size, or edition consistency matters. You may be able to skip it for a simple reorder that uses the same file, size, paper, and border you already approved.
What should I ask before ordering a larger print run?
Ask whether the file is ready at the final size, which surface fits the artwork, whether a border helps the presentation, how the print will be packed, and how you will repeat the order later.