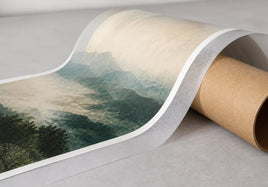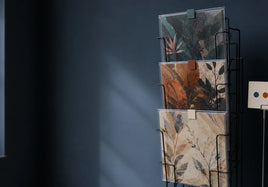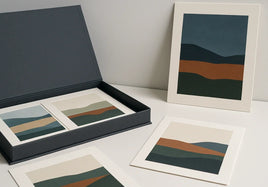


If you are getting prints ready to sell, mounted prints can be a smart choice. But the best choice depends on the artwork, the file, and how the print will be handled.
Here is the short version: Use mounted prints when it fits the artwork, the file, the final presentation, and the way the print will be sold or displayed. A good next step is to compare mounted prints as you read.
Start With How You Will Sell It
A print is not just an image. It's something people will hold, frame, ship, gift, or hang. Small choices like paper surface, border size, crop, and proofing can change how finished work feels in the finished sale, display, or collector presentation.
For artists, the print should still feel like the original work. For photographers, it should hold the right detail, tone, and mood. Either way, the print needs to feel intentional when someone sees it in person.
Keep the Print Plan Simple
Start with the final use. Think about how the print will be sold, handled, framed, shipped, or displayed.
If you are still deciding on surface, size, border, or workflow, ask Stackhouse before placing the order.
A useful decision pass looks like this:
- Identify whether the work is a reproduction, photograph, digital illustration, or mixed-media file.
- Decide if the print will be sold flat, framed, mounted, shipped, or delivered locally.
- Confirm the final size before evaluating crop, border, and resolution.
- Choose a paper or surface based on the image, not only on the product label.
- Use proofing or samples when color, texture, or edition consistency matters.
Pick a Surface That Fits the Artwork
The best surface is the one that helps the image. Texture can add feeling. Smooth papers can hold fine detail. Mounted and canvas options can make the print feel more ready to hang.
No paper is perfect for every image. A textured paper can feel beautiful, but it may hide tiny details. A smoother paper can keep detail sharp, but it may not feel as tactile. The right answer depends on the work.
Check the File Before You Order
A ready file makes the whole print order easier. Check the resolution, crop, color profile, and border before you order. If something is off, fix it before it becomes a physical print.
Check resolution, aspect ratio, color profile, crop, border, and edge detail before ordering.
Ask for Help When It Matters
Some jobs are worth a quick check before you order. Large prints, odd crops, color-sensitive artwork, mixed-media originals, and edition launches can all use another set of eyes.
When you are ready to order, use the most relevant Stackhouse product or contact path.
Plan the Edition Before You Order
If this print will become part of an edition or product line, write down the details. Keep track of the paper, size, border, crop, and proofing choices. That way, the next order can match the first one.
A small test run can be smarter than a big inventory order. It lets you check the surface, color, packaging, and customer response before you spend more.
Common Mistakes to Avoid
The most common mistake is choosing a product before deciding what the print needs to do. Another is judging paper only from a screen. A third is waiting too long to think about crop and borders. A short checklist can prevent all three.
Match the Print to the Job
Start by asking what mounted prints need to do. A print for a bin at an art fair has a different job than a print going straight into a frame. A proof for your own studio has a different job than an edition you plan to reorder all year.
This sounds simple, but it helps. When the job is clear, the paper, size, border, crop, and packaging choices become easier. You are not trying to pick the fanciest option. You are trying to pick the option that makes the work feel finished and easy to sell.
Think About the Buyer Experience
Most buyers are not thinking like printers. They are looking at the image, the feel of the paper, the size, and whether the piece feels worth taking home. Small production choices can make that decision easier.
A clean border can make a print feel calmer. A paper with texture can make a reproduction feel more like an art object. A smooth surface can help a photograph keep detail. The best choice is the one that supports the artwork without calling too much attention to itself.
Check the File at the Real Size
Don't judge the file only while it's zoomed out on a screen. Look at it at the final print size, or as close as you can. Check the corners, signature, border, shadows, and any fine lines. Those are the details that tend to surprise people later.
If the image will be printed large, tiny problems can become easier to see. If the image will be printed small, important details can get lost. The goal is not to make the file perfect in the abstract. The goal is to make it work at the size people will actually receive.
Use Samples When the Choice Feels Close
A screen can help you choose an image, but it can't fully show paper texture, paper tone, thickness, or glare. If two options feel close, a sample can save you from guessing.
Samples are especially helpful when you are building a product line. Once you find the paper and size that fit the work, you can repeat that choice with more confidence. That makes reorders easier and helps your shop or booth feel more consistent.
Keep the Order Easy to Repeat
If you may order the same piece again, write down the details. Keep the paper, size, border, crop, and file name somewhere you can find later. Future you will be grateful.
This matters most for editions, best sellers, and prints you plan to keep in stock. A small note can prevent a reorder from coming back with a slightly different crop, border, or surface. Consistency helps the work feel more professional over time.
Decide What Needs a Proof
Not every order needs a proof. A simple reorder with the same file and same settings may be straightforward. But a new image, a large size, a dark photo, a soft watercolor, or an important edition can be worth checking first.
A proof is not a delay for the sake of delay. It's a way to catch the small things before they become a full order. Color, contrast, border width, and paper feel are all easier to adjust before the final run.
Keep Product Names From Making the Choice for You
Product names are useful, but they should not make the whole decision. The better question is how mounted prints support the image. Think about mood, detail, handling, display, and how the buyer will receive it.
For example, a quiet drawing may need a different surface than a high-contrast photograph. A print that will be handled at a market may need different packaging than one going straight into a frame. Start with the artwork, then choose the print path.
Plan for Handling and Shipping
A print doesn't stop being important once it leaves the printer. It still has to be packed, handled, shipped, stored, or displayed. The print choice should make those steps easier, not harder.
Think about whether the work will be sleeved, rolled, mounted, framed, boxed, or carried to an event. If the print will travel, protect the corners and surface. If people will browse it in person, make sure the presentation can handle real hands and real movement.
Keep the First Run Small if You Are Unsure
A small first run can be smarter than a large order. It lets you test the print in real life. You can see how the paper feels, how the size sells, how the packaging works, and how buyers respond.
Once you know what works, ordering more feels less risky. This is especially useful for artists adding a new size, photographers testing a new finish, or anyone preparing inventory before a fair, shop update, or holiday season.
Compare Choices One at a Time
If you are stuck between a few options, try not to compare everything at once. Pick one thing to decide first. Start with size, then surface, then border, then packaging. A clear order keeps the decision from turning into a pile of maybes.
For mounted prints, this is especially helpful because every choice affects the next one. A larger size can change the crop. A textured paper can change detail. A border can change how the print feels in a sleeve or frame.
The goal is not to make the most complicated print plan. The goal is to make a print that looks good, sells clearly, and can be repeated without stress.
Make One Clear Default Option
Artists often want to offer every possible version of a piece. That can feel generous, but it can also make buying harder. Most buyers want a clear, confident option. They want to know what you recommend.
Choose one default size and surface that fit the artwork well. You can still offer other sizes or special orders, but the default gives people an easy place to start.
This also makes inventory easier. You can stock the version that sells most often, then handle custom requests separately.
Know When Bigger Is Not Better
Large prints can be beautiful, but bigger is not always the best choice. A large print needs enough resolution, enough wall space, and the right kind of image. Some work gets stronger at scale. Some work feels better small and intimate.
Before sizing up, think about the details in the file. Look at line quality, brush texture, grain, shadows, and any areas that may look soft. If the image starts to fall apart at the larger size, a smaller print may feel more polished.
Buyers also think about framing and shipping. A size that's easy to frame can sell more smoothly than a dramatic size that creates extra work.
Price With the Whole Print in Mind
Price is not only about the print cost. Think about packaging, shipping, sleeves, labels, market fees, your time, and the way the piece fits into the rest of your work.
If the print is part of a larger collection, keep the pricing ladder simple. Small prints, medium prints, and larger pieces should make sense next to each other. Buyers should not need a spreadsheet to understand the difference.
A good print choice supports that pricing. It should feel worth the price in person, not just look good on a product page.
Write Down the Specs
Once you choose the print setup, write it down. Include the file name, size, paper or surface, border, crop notes, and any proofing details. If you changed something after a test print, write that down too.
This is boring in the best possible way. It saves future orders. It helps if you need to reorder quickly before a market, replace a damaged print, or keep an edition consistent.
You don't need a fancy system. A simple note in your studio records is enough, as long as you can find it later.
Think About How It Will Be Photographed
If you sell online, the finished print needs to photograph well. Paper texture, glare, border width, and packaging can all change how the product looks in a listing.
Matte surfaces are often easier to photograph because they reflect less light. Glossy or shiny surfaces can look rich in person, but they may need more careful lighting. Mounted or framed pieces may need a wider photo so buyers understand scale.
This doesn't mean you should choose only what photographs easily. It means you should know what the final print will need when it's time to show it online.
Watch for Color Surprises
Color can shift when an image moves from a bright screen to paper. That doesn't always mean something went wrong. Screens glow. Paper reflects light. Different surfaces hold ink in different ways.
Very dark images, soft gradients, pale colors, and saturated reds or blues are worth checking closely. If those details are important to the piece, a proof can help you decide whether the file needs a small adjustment.
Try to judge the print under normal viewing light, not only under harsh studio light or a dim room. The print should work where a buyer is likely to see it.
Make Packaging Part of the Plan
Packaging is part of the buyer experience. A print can look perfect, then feel less professional if it arrives bent, scuffed, or confusing to unpack.
Think about sleeves, backing boards, tubes, flat mailers, labels, and care notes before you order a large batch. The best print format is one you can protect well.
If you sell at markets, packaging also affects speed. You want to hand someone their print without digging through loose materials or worrying about damaged corners.
Decide What You Will Explain to Buyers
You don't need to give buyers a technical lecture. But a simple explanation can help them understand the value of the print.
For mounted prints, keep the explanation short. Talk about the surface, the feel, the color, the edition, or why you chose that format for the artwork. Use normal words. If it sounds like something you would say at your table or in an email, it's probably right.
A clear explanation helps the print feel intentional. It also gives buyers confidence that they are getting a real, carefully made piece.
Leave Room for Future Reorders
If a print sells well, you may want to order it again. Make that easy from the beginning. Keep the file organized. Keep the specs saved. Keep notes about what you liked and what you would change.
Reorders are where consistency matters. A buyer who sees the print later should not feel like the second run is a different product. The paper, size, crop, and color should stay close enough that the edition still feels unified.
This is one reason a proof or small first run can be useful. It gives you a stable version to repeat.
Final Takeaway
The best mounted prints choice depends on the artwork, the file, and how the print will be used. Start with the final presentation, pick a surface that fits the image, check the file, and ask for help when a detail could affect the final print.
FAQ
Are mounted prints better for artists or photographers?
It can work for both. The better question is what the image needs, how the print will be sold, and how you want it to feel in person.
What should I check before ordering mounted prints?
Check the final size, crop, border, resolution, color, and paper choice. If the order is large or color-sensitive, order a proof first.
Should I order a sample before producing a full edition?
Yes, if the paper, color, border, or packaging will affect how people see the work. A small test can save a lot of stress later.