TL;DR
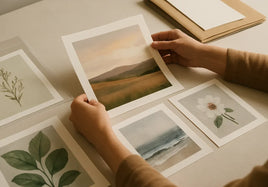
When printing your original art at The Stackhouse Printery , the first and most important step is capturing a high-resolution digital image. Whether your work is a painting, drawing, or mixed-media piece, creating a clear and color-accurate file ensures your print looks just like the original. This guide covers everything from scanning vs photographing to color correction and file preparation.
Why Proper Digitization Matters
Digitizing your artwork correctly protects its integrity and ensures that every brushstroke, pencil line, and color nuance translates beautifully onto print. When your file is sharp, properly lit, and saved with an RGB color profile, you can achieve exceptional results with our giclee printing process.
Poorly digitized files can result in dull colors, visible pixels, or uneven tones. Taking time to get this right pays off in the quality of your final print.
Scanning vs Photographing Artwork
Both scanning and photographing can produce excellent results, depending on the size and texture of your piece. Below is a comparison of each method:
| Photographing | Scanning |
|---|---|
| Photograph in sections, then merge for larger pieces | Scan sections if artwork is larger than the scanning bed |
| Use full sensor size, avoid zooming | Smooth or flatten artwork before scanning |
| Shoot in RAW or TIFF for best results | Clean the scanning bed and remove dust or smudges |
| Use even, bright light at 45° angles to avoid shadows | Scan at 300 DPI or higher, and at actual or print size |
| Keep camera and artwork level and in focus | Check focus if artwork has heavy texture |
| Clean the lens and edit out imperfections | Embed an RGB color profile before saving |
| Use a tripod for sharpness | Crop out excess background or scanner borders |
Learn more: Photographing Your Art for Printing
Resolution Guidelines for Printing
Resolution determines how sharp and detailed your print will look. At The Stackhouse Printery, we recommend 300 DPI at the desired print size.
If you’re unsure how large your file can print, use this quick formula:
Print Size (in inches) = Pixel Dimensions ÷ 300
Example: A file that’s 6600 × 5100 pixels prints best at 22 × 17 inches or smaller.
6600 ÷ 300 = 22 and 5100 ÷ 300 = 17
If your file isn’t large enough, resizing software can sometimes help—but always review for artifacts or blurriness after enlargement.
For more on print sizing and borders, check out our Sizing and Borders Guide.
Color Correction and File Cleanup
Color accuracy is critical when printing fine art. Even the best cameras and scanners can introduce subtle color shifts, which is why color correction and cleanup are key.
Start by using neutral, even lighting (such as daylight-balanced bulbs) to avoid unwanted tints or reflections. After capturing your file, use editing software like Adobe Photoshop or Lightroom for adjustments:
Basic Color Correction Steps
- Set the white balance to neutralize color casts.
- Adjust exposure so your highlights and shadows match the original art.
- Fine-tune saturation and hue for color accuracy.
- Remove dust or blemishes using the healing or clone tool.
- Embed your color profile before saving.
Learn more in our Guide to Mastering Color Correction.
Common Artwork Digitization Mistakes
Here are frequent issues we see at The Stackhouse Printery and how to fix them before printing:
| Issue | Cause | Fix |
|---|---|---|
| Blurry image | Camera shake or movement | Use a tripod or faster shutter speed |
| File too dark | Underexposure or bright monitor | Add more light or reduce monitor brightness |
| Uneven lighting | Blocking the light source | Use two even lights at 45° angles |
| Background visible | Poor crop or framing | Re-shoot closer or crop to the artwork edges |
| Pixelated image | Low resolution or compression | Use RAW or TIFF, avoid resizing down |
| Out-of-focus file | Shallow depth of field or misalignment | Flatten artwork, align camera, lower aperture |
Before submitting, zoom in 100% on your image to check for these problems. A quick review can save you time and ensure a perfect final print.
How to Proof Your Digital File
- View it at actual size on a calibrated monitor.
- Print a small test section to check texture and tone.
- Compare it side-by-side with the original artwork under neutral light.
- Save your file as a TIFF or high-quality JPEG in the RGB color space.
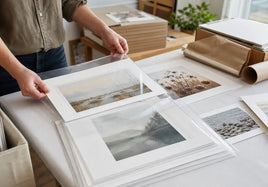
Professional Scanning Services at The Stackhouse Printery
If you’d rather leave digitization to the pros, The Stackhouse Printery offers in-house scanning and photography services using state-of-the-art equipment. Our art scanning service produces 300 DPI or higher TIFF files with accurate color and minimal distortion—perfect for reproductions, archival work, or creating prints of your original art.
What You’ll Receive:
- High-resolution TIFF file (300 DPI, ProPhoto RGB)
- Print-ready JPEG in AdobeRGB (1998)
- Web-ready JPEG (2000 px, sRGB)
Not sure whether your file is print-ready? Email our team and we’ll review it for free before you print.
Additional Resources
Final Thoughts
Properly digitizing your artwork ensures that every print captures the same emotion and detail as your original piece. Whether you choose to photograph or scan, take your time to ensure focus, lighting, and color accuracy are just right. When you’re ready, let The Stackhouse Printery bring your artwork to life with archival-quality giclee prints that last for generations.