

A long size menu can look helpful and still make an art print harder to buy. The artist has more files to manage, the buyer has more numbers to compare, and every new option creates another crop, price, package, and reorder note. A three-size collection gives each size a clear job without turning the product into a custom build.
For loose prints, start with one small entry size, one middle default, and one larger statement size. The three should feel related, show the artwork well, and be simple enough to explain in one short sentence.
Give Loose Prints Three Clear Size Roles
The small size should feel easy to try, give, or place in a limited space. The middle size should be the normal choice for most buyers. The large size should make the artwork feel more present without becoming a difficult special order. These are roles, not universal inch measurements.
Write the role beside each proposed size. If two sizes do the same job, remove one. A useful ladder creates three different buying decisions instead of three nearly identical numbers.
Start With the Middle Size
Choose the middle size first because it becomes the center of the offer. It should show the important detail, fit a normal wall or shelf, support a fair selling price, and use packaging you can handle consistently. If the middle option feels awkward, adding a small and large version won't fix the product.
Print or mock up the middle size and view it from the distance a buyer will use. Check whether the image feels complete, whether fine detail still matters, and whether the physical piece is easy to hold and picture in a room.
Make the Small Size Feel Intentional
A small print should not look like the artwork was simply shrunk. Check thin lines, faces, texture, signatures, and quiet space. If the main idea disappears, use a different image or create an approved crop for that size instead of forcing every piece into the same small format.
Keep the offer clear. The small size can be the entry point, gift choice, or easy add-on, but it still needs the same paper, naming, and finish standards as the rest of the collection.
Let the Large Size Earn Its Place
The large print should create a visible change in impact. Check the file at the real output dimensions and inspect fine detail at 100 percent. Then think about the finished physical footprint. A size that looks exciting on a screen may need a box, flat storage area, or wall space that changes the price and buyer experience.
Don't add the large option only to make the middle one look cheaper. Add it when the artwork holds up, the package can protect it, and the selling price covers the complete order.
Keep One Image Ratio When You Can
A shared ratio makes the three sizes easier to prepare and explain. The same composition can scale without moving the edges for every order. If a common size needs a different ratio, decide whether a small crop is acceptable or whether that size should leave the collection.
Before you lock the ladder, use the print size, border, and cropping guide to compare image ratio, crop, borders, and final paper size.
When a different crop is necessary, save it as its own approved file. Don't let checkout make the crop decision. Put the size in the file name and keep a preview with the order note.
Check the Price Steps Together
Place the three finished prices beside each other. Each step should feel understandable to a buyer and workable for the studio. Include the print, package, fees, expected handling time, and normal damage allowance. A larger piece that costs more to protect and ship needs that difference in the price.
The middle size should not feel like a bad compromise. It should be the confident default. The small and large choices should serve buyers with different space, budget, or visual-impact needs.
Test the Full Buyer Handoff
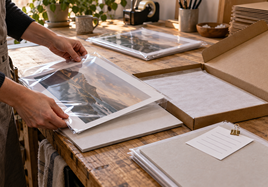
Lay out one example or paper mockup of each size. Add the product name and final price. Ask someone to choose without a long explanation. Notice where they pause. Confusion may mean the size names, photos, or price steps need work, not that the menu needs another option.
Pack each size using the normal handoff or shipping plan. The collection is not finished until all three can move from the studio to the buyer without guesswork.
Confirm the Current Print Paths
Review current loose print formats to choose the paper, photo, canvas, or small-format path that fits the collection.
Use the size guide and current order path to confirm what can be ordered, then keep your approved three-size plan in one studio note. Don't promise a size or package from an old list without checking the current path again.
Save One Reorder Card for Each Size
Record the file name, image ratio, finished size, paper, quantity, price, and package for the small, middle, and large versions. Add a photo or preview of the approved crop. The three cards should be easy to compare and hard to mix up.
When buyers repeatedly ask for another size, test it as a temporary fourth option before rebuilding the full collection. Real questions are better evidence than a long menu created from guesses.
Final Takeaway
A useful loose prints collection gives every option a job. Build the middle default first, make the small version intentional, and let the large version earn its extra space and price. Keep the ratio, package, and reorder notes clear so buyers get a simple choice and the studio gets a repeatable product.
FAQ
Do artists need to offer every print size?
No. A small, middle, and large option is often easier to understand and maintain than a long menu. Add another size only when buyers repeatedly ask for it.
Which art print size should be the default?
Use the middle size as the default when it shows the artwork clearly, fits the normal buyer budget, and is practical to package and reorder.
Should all three sizes use the same crop?
Keep the same image ratio when possible. If a size needs a different crop, treat it as a separate approved version and save that file and order note clearly.